
Database초보우낙
7. 모든 data file들을 전부 삭제하고 복구 본문
완전 복구 : 장애가 나기 전 마지막 commit시점으로 데이털르 복구
불완전 복구 : 과거의 특정 시점으로 복구
가급적 완전 복구를 하는게 제일 좋지만
특별한 사정에 의해서 완전복구를 못하게 되면 불환전 복구를 해야한다.
■ 실습.
#0. Ouh로 접속
#1. hot 백업을 수행
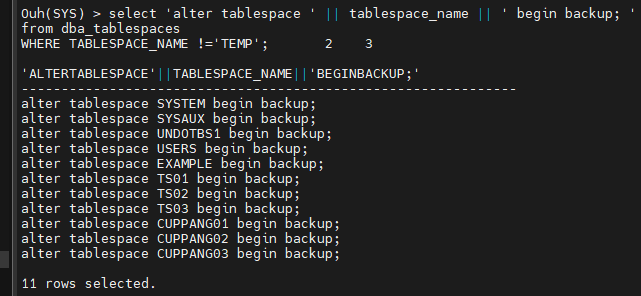
#1-1 hot 백업을 수행하기 위해 begin 스크립트 추출
select 'alter tablespace ' || tablespace_name || ' begin backup; '
from dba_tablespaces
WHERE TABLESPACE_NAME !='TEMP';--TEMP는 백업할 필요없다, TEMP가 없으면 startup시에 자동으로 생성된다
alter tablespace SYSTEM begin backup;
alter tablespace SYSAUX begin backup;
alter tablespace UNDOTBS1 begin backup;
alter tablespace TEMP begin backup;
alter tablespace USERS begin backup;
alter tablespace EXAMPLE begin backup;
alter tablespace TS01 begin backup;
alter tablespace TS02 begin backup;
alter tablespace TS03 begin backup;
alter tablespace CUPPANG01 begin backup;
alter tablespace CUPPANG02 begin backup;
alter tablespace CUPPANG03 begin backup;

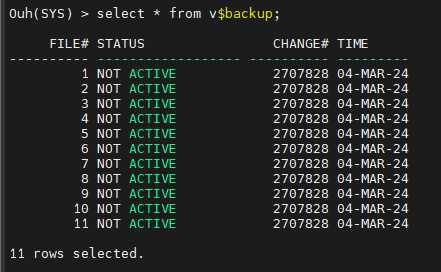
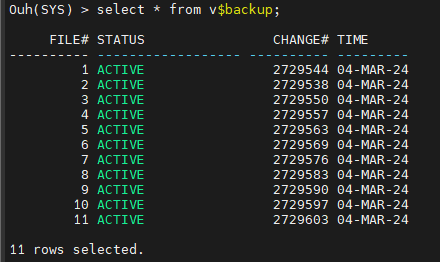
#1-2 백업보드에 있는지 확인
select * from v$backup;#1-3 os에서 data file을 copy
<os>
$ mkdir /home/oracle/hot_20240304

<sys>
select 'cp '|| file_name || ' /home/oracle/hot_20240304'
from dba_data_files;
<os에서 진행 > --hotbackup 받기
cp /u01/app/oracle/oradata/Ouh/ts01.dbf /home/oracle/hot_20240304
cp /u01/app/oracle/oradata/Ouh/example01.dbf /home/oracle/hot_20240304
cp /u01/app/oracle/oradata/Ouh/users01.dbf /home/oracle/hot_20240304
cp /u01/app/oracle/oradata/Ouh/undotbs01.dbf /home/oracle/hot_20240304
cp /u01/app/oracle/oradata/Ouh/sysaux01.dbf /home/oracle/hot_20240304
cp /u01/app/oracle/oradata/Ouh/system01.dbf /home/oracle/hot_20240304
cp /u01/app/oracle/oradata/Ouh/ts02.dbf /home/oracle/hot_20240304
cp /u01/app/oracle/oradata/Ouh/ts03.dbf /home/oracle/hot_20240304
cp /u01/app/oracle/oradata/Ouh/cuppang01.dbf /home/oracle/hot_20240304
cp /u01/app/oracle/oradata/Ouh/cuppang02.dbf /home/oracle/hot_20240304
cp /u01/app/oracle/oradata/Ouh/cuppang03.dbf /home/oracle/hot_20240304
#1-4 end backup을 수행하는 스크립트 추출
select 'alter tablespace ' || tablespace_name || ' end backup; '
from dba_tablespaces
WHERE TABLESPACE_NAME !='TEMP';
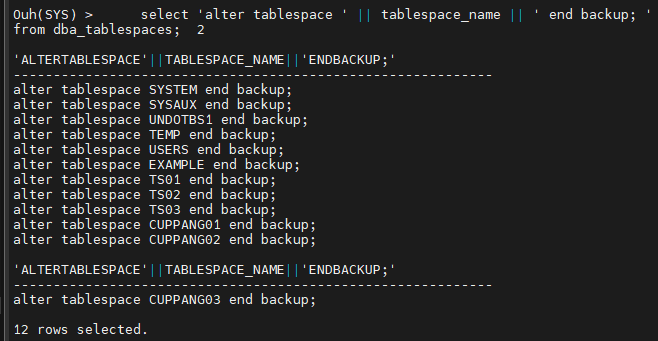
alter tablespace SYSTEM end backup;
alter tablespace SYSAUX end backup;
alter tablespace UNDOTBS1 end backup;
alter tablespace TEMP end backup;
alter tablespace USERS end backup;
alter tablespace EXAMPLE end backup;
alter tablespace TS01 end backup;
alter tablespace TS02 end backup;
alter tablespace TS03 end backup;
alter tablespace CUPPANG01 end backup;
alter tablespace CUPPANG02 end backup;
alter tablespace CUPPANG03 end backup;
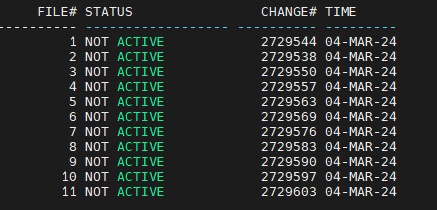
#1-5 일반모드로 변경되었는지 확인
select * from v$backup;#2. scott 유저에서 테이블을 생성
connect scott/tiger

<scott에서 진행>
 create table emp_cuppang
              tablespace ts01
              as
              select * from emp;
#3. 데이터를 입력하고 로그스위치를 여러 번 일으킨다
<scott에서 진행>
insert into emp_cuppang
select * from emp_cuppang;

--sys에서 진행
alter system switch logfile;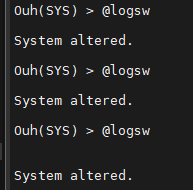
#4. DB를 내리고 모든 data file들을 전부 삭제
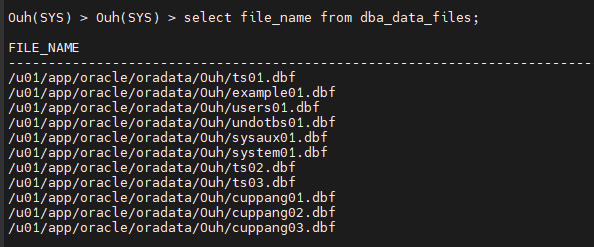
--위치확인
select file_name from dba_data_files;

--서버내리기
shutdown abort

--데이터삭제
cd /u01/app/oracle/oradata/Ouh
rm *.dbf
#5. DB를 startup
startup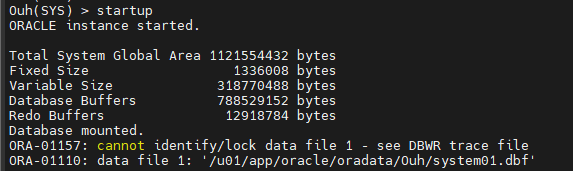
---복구해야할 파일 리스트 출력
col ERROR FOR a25
select * from v$recover_file;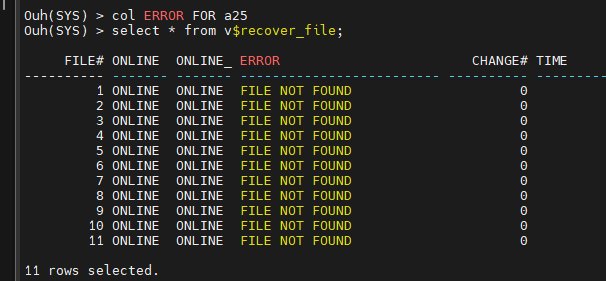
---복구해야할 파일 확인
| ed recovery_redo.sql col name for a30 select r.file#, d.name from v$recover_file r, v$datafile d where r.file#=d.file# and error='FILE NOT FOUND'; |
#6. 백업 받은 파일들을 복원
$ cd
$ cd hot_20240304
$ cp *.dbf  /u01/app/oracle/oradata/Ouh/
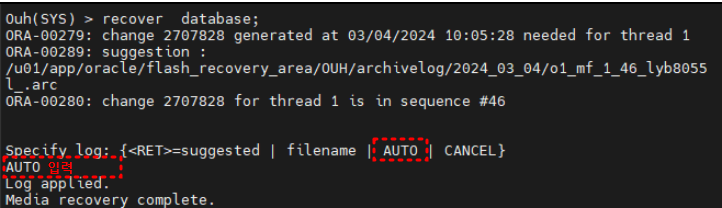
#7. 복원한 파일에 로그파일을 적용해서 완전복구
recover database;Specify log: {<RET>=suggested | filename | AUTO | CANCEL}
auto <--- 이렇게 적으면 알아서 아카이브 로그 파일을 복원한 파일에 적용합니다.
alter database open;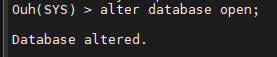
#8. scott유저에서 생성한 테이블을 select
select count(*) from emp_cuppang;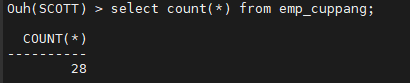
정리 :
모든 data file 들을 전부 삭제를 하는 장애가 발생
controfile과 redo logfile은 있다
이런 경우는 백업받은 모든 data file들을 다 복원해와서
아카이브 로그 파일고 최신 리두로그 파일까지 적용하면 다 복구된다
아카이브 로그 파일 , corrent redo log file 까지 적용해야 완전 복구
recover database 하나로 모두 복구할 수 있다
문제1. 다시 datafile 전체를 hotbackup을 수행하고 scott유저에서 dept_cuppang 테이블을 ts01 테이블 스페이스에 생성하세요!
그리고 dept_cuppang 테이블에 데이터를 입력하고 로그 스위치를 일으키는 작업을 3번 수행하세요
서버를 내리고 모든 datafile들을 전부 삭제 후 서버를 올린 이후에 복원,복구하세요
#1 datafile 전체를 hotbackup을 수행
select 'alter tablespace ' || tablespace_name || ' begin backup; '
from dba_tablespaces
WHERE TABLESPACE_NAME !='TEMP';
<위 코드 실행결과>
alter tablespace SYSTEM begin backup;
alter tablespace SYSAUX begin backup;
alter tablespace UNDOTBS1 begin backup;
alter tablespace USERS begin backup;
alter tablespace EXAMPLE begin backup;
alter tablespace TS01 begin backup;
alter tablespace TS02 begin backup;
alter tablespace TS03 begin backup;
alter tablespace CUPPANG01 begin backup;
alter tablespace CUPPANG02 begin backup;
alter tablespace CUPPANG03 begin backup;
select * from v$backup;
$ mkdir /home/oracle/hot_20240304_2select 'cp '|| file_name || ' /home/oracle/hot_20240304_2'
from dba_data_files;<위 코드 실행결과>
cp /u01/app/oracle/oradata/Ouh/ts01.dbf /home/oracle/hot_20240304_2
cp /u01/app/oracle/oradata/Ouh/example01.dbf /home/oracle/hot_20240304_2
cp /u01/app/oracle/oradata/Ouh/users01.dbf /home/oracle/hot_20240304_2
cp /u01/app/oracle/oradata/Ouh/undotbs01.dbf /home/oracle/hot_20240304_2
cp /u01/app/oracle/oradata/Ouh/sysaux01.dbf /home/oracle/hot_20240304_2
cp /u01/app/oracle/oradata/Ouh/system01.dbf /home/oracle/hot_20240304_2
cp /u01/app/oracle/oradata/Ouh/ts02.dbf /home/oracle/hot_20240304_2
cp /u01/app/oracle/oradata/Ouh/ts03.dbf /home/oracle/hot_20240304_2
cp /u01/app/oracle/oradata/Ouh/cuppang01.dbf /home/oracle/hot_20240304_2
cp /u01/app/oracle/oradata/Ouh/cuppang02.dbf /home/oracle/hot_20240304_2
cp /u01/app/oracle/oradata/Ouh/cuppang03.dbf /home/oracle/hot_20240304_2
select 'alter tablespace ' || tablespace_name || ' end backup; '
from dba_tablespaces
WHERE TABLESPACE_NAME !='TEMP';
<위 코드 실행결과>
alter tablespace SYSTEM end backup;
alter tablespace SYSAUX end backup;
alter tablespace UNDOTBS1 end backup;
alter tablespace USERS end backup;
alter tablespace EXAMPLE end backup;
alter tablespace TS01 end backup;
alter tablespace TS02 end backup;
alter tablespace TS03 end backup;
alter tablespace CUPPANG01 end backup;
alter tablespace CUPPANG02 end backup;
alter tablespace CUPPANG03 end backup;
#2 scott유저에서 dept_cuppang 테이블을 ts01 테이블 스페이스에 생성하세요!
connect scott/tiger

<SCOTT로 실행>
create table dept_cuppang
              tablespace ts01
              as
              select * from dept;
#3 dept_cuppang 테이블에 데이터를 입력하고 로그 스위치를 일으키는 작업을 3번 수행하세요
--scott에서 진행
insert into dept_cuppang
select * from dept_cuppang;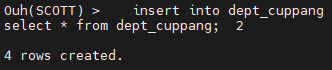
--sys에서 진행
alter system switch logfile;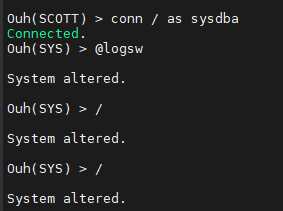
#4 서버를 내리고 모든 datafile들을 전부 삭제 후 서버를 올린 이후에 복원,복구하세요
select file_name from dba_data_files;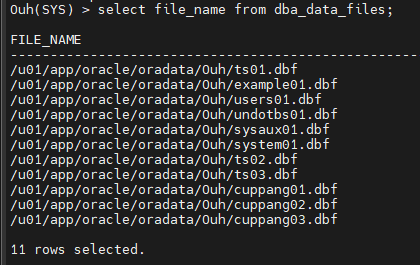
--<sys> 서버 내리기
shutdown abort

--<os> 데이터삭제
cd /u01/app/oracle/oradata/Ouh/
rm *.dbf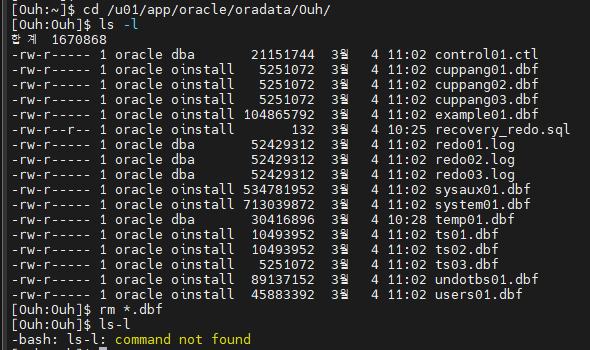
--복구해야할 파일 확인
@recovery_redo.sql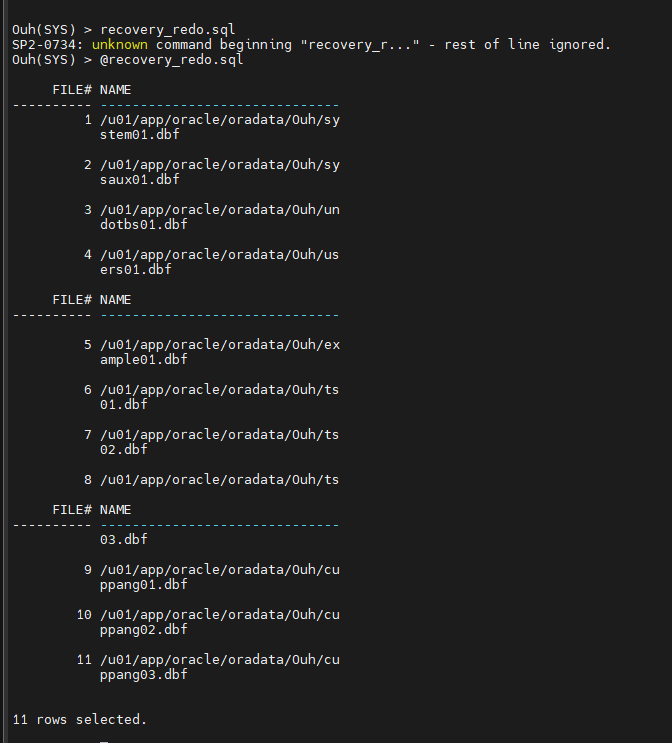
<os>
$ cd
$ cd hot_20240304_2
$ cp *.dbf  /u01/app/oracle/oradata/Ouh/

<sys>
recover  database;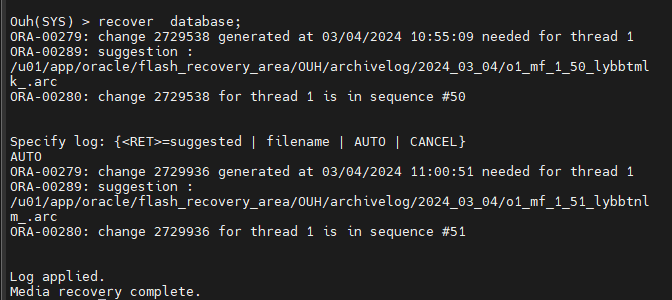
<sys> --database open
alter database open;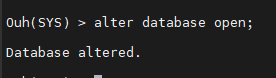
select * from dept_cuppang;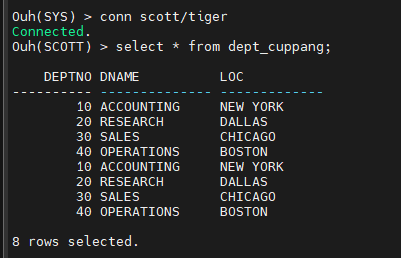
'백업과 복구 > 완전복구' 카테고리의 다른 글
| 10. control file을 multixplexing하기 (0) | 2024.04.12 |
|---|---|
| 9. binary file로 백업받은 controlfile 복구 (0) | 2024.04.12 |
| 8. 1개의 control file이 삭제되었을 경우 (0) | 2024.04.12 |
| 6. system data file 을 삭제하고 복구하기 (0) | 2024.04.10 |
| 5. non system data file을 삭제하고 복구 (0) | 2024.04.10 |


